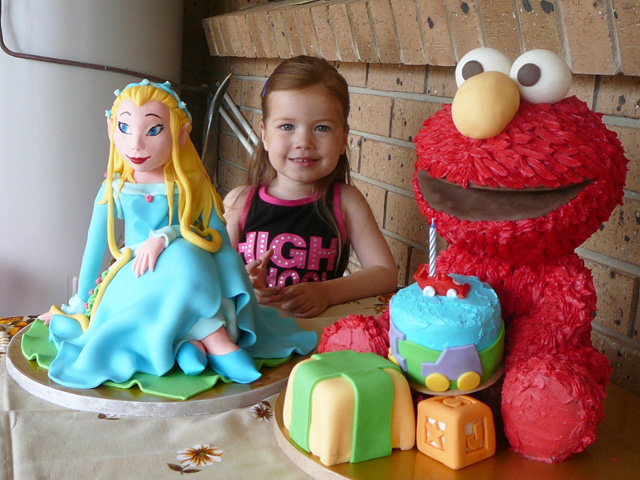
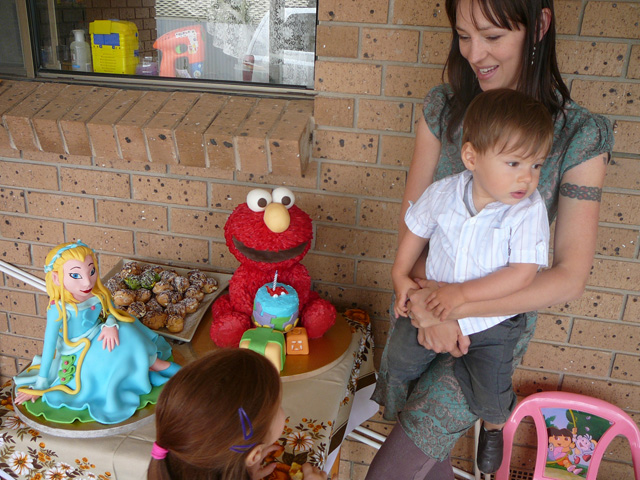
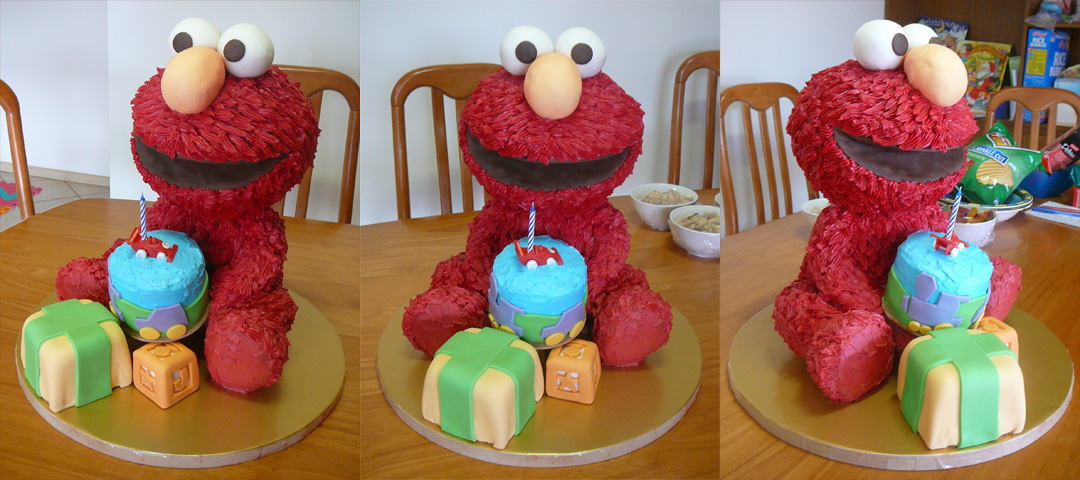
 Last week was Anastasia’s 3rd birthday,we had a party for her on Saturday, and here’s the cake… well cakes. The Rani one is for Anastasia and the Elmo cake was for my nephew Alekos’ first birthday, just a couple of months late.
You see Alekos’ Birthday was in October, and I’d planned to have this Elmo cake done then, but unfortunately he was unwell, we thought measles, and had to postpone his party. Luckily I had enough notice that I hadn’t actually started the cake yet. As the new party date approached everything seemed to be going ok so I started making the cake, but just before the day the poor kid got sick again so the party was canceled, leaving me with a half finished cake in the freezer. I had planned to finish it at some point before we went to town so I could take it to him, after all even without a party Alekos could still enjoy the cake, But leading up to each trip to town I was too busy to work on it, and on the two occasions Alekos came to visit us I didn’t have enough notice.
So I came to the planning stage of Anastasia’s cake, and I realized that I might not have enough room in the freezer for both cakes. That meant I would have to either complete Elmo, or potentially throw it out (or take it to the old folks as I did with the practice lion). Since there wasn’t too much work to be done on it, and Alekos would be here for Anastasia’s party I realised it was the perfect opportunity to finish it and be able to give it to Alekos. The only problem was that I’d have to allow enough time to make two cakes.
So I planned to have Anastasia’s Rani cake finished on Thursday, finish Elmo on Friday, ready for the party on Saturday. But things never seem to go to plan…
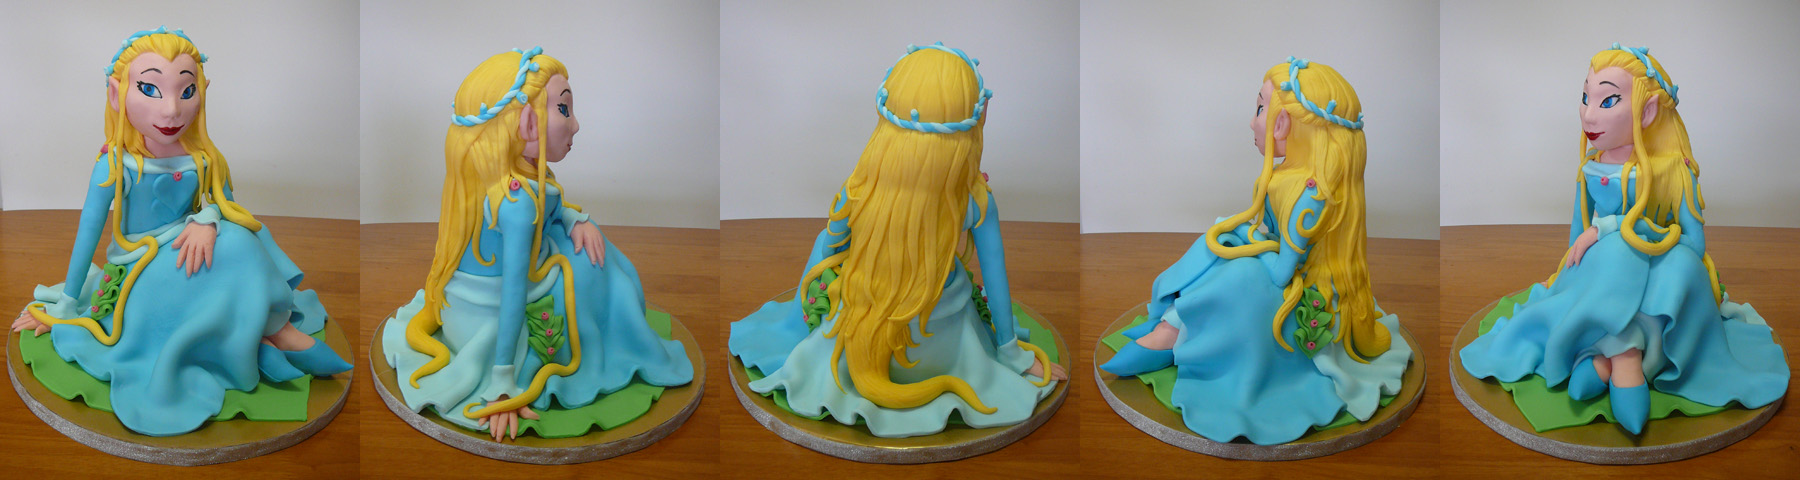
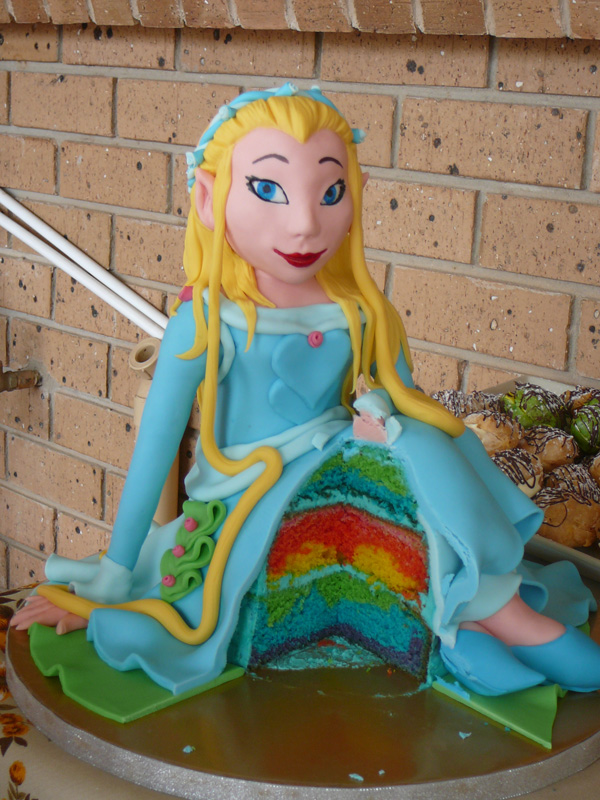
 It started a few weeks ago as I was trying to decide what cake to make for Anastasia’s birthday. I knew I’d have to top Serenity’s Dorothy cake, but there was no way I was doing anything as full on as the Lion King cake. But it seemed every time I asked Anastasia what she wanted, it was something different. To the point that one time I asked she scanned the kitchen and promptly replied with “A fly swat cake Dad”. I figured I’d have to actually make her something as random as fly swat cake or stop asking and come up with something myself. Of the many things to choose from Disney Fairies is up at the top, and Rani, the water-talent fairy is her favorite as she got a Rani doll for her last birthday, and her fairies bed spread has her sleeping on a Rani pillow every night. So it wasn’t too difficult to come up with the idea of making a Rani cake. Another bonus was that I could choose to include the wings or not, as Rani is the only fairy that doesn’t have wings (I feel like I may know a little too much about this stuff…).
Lately “I can sing a rainbow” is one of Anastasia’s favorite songs, so I thought that it would also be fun to try making a rainbow cake rather than the chocolate I normally make.
So I had the plan. Make the stand, bake cakes and make fondant on Tuesday, carve the cakes and do the rice crispies on Wednesday, and cover with fondant on Thursday, leaving Friday to complete Elmo.
 Tuesday I had no probs making the stand and cakes, but being the actual day of Anastasia’s birthday, the morning was taken up with presents and making the stand, and in the afternoon we had some friends and relatives coming that weren’t able to make it to the party on Saturday. I also had to re-use cake tins, so had to wait until the first batch of cakes were cooled before making the second batch which put me further behind. So I didn’t get around to making the fondant that day. But that’s ok, there would still be time to make the fondant the next day as I wouldn’t really need it until Thursday.
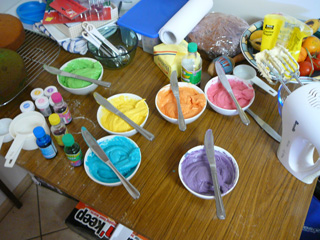
I had read up online about how to make rainbow cakes. Just separate the cake mix into different bowls and color each bowl. If you add the mixture to the cake pans carefully it should end up with bands of color. It seemed to go ok but I wouldn’t know for sure until I cut them.
 Wednesday I was excited to start carving the cakes so I could see how the rainbow worked. I was surprised how vibrant the colors were, as the mixture was fairly pastel colors. But it looked pretty cool. I did learn that the bottom color gets smooshed down flatter than the others, and the top color gets some cut of when leveling, so if each cake as three or more colors, as these did, you need to make more of the top and bottom colors.
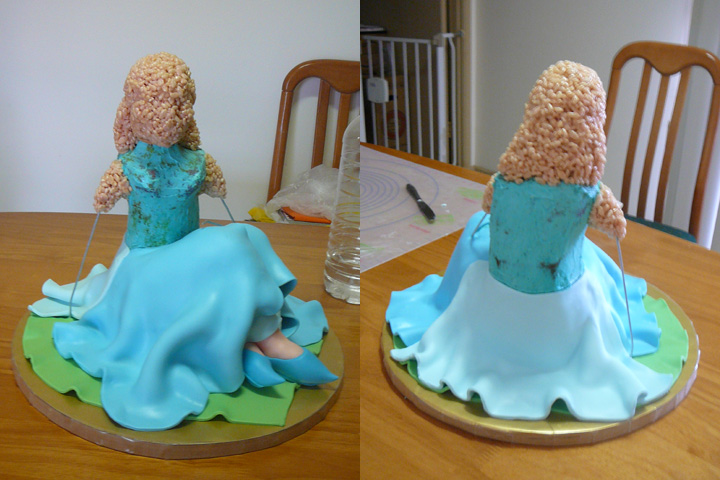
So I stacked and carved the cakes, all going well until I realised the cakes were higher than I’d planned and I kinda ran out of room for her neck. I also made a boo-boo in my planning, with the arm supports as a single piece of wire running through the dowel in the middle. Since the cake was higher it covered the hole for the wire, so I had to make an extra cut in the cake. It may have been easier to have each arm a separate wire, although that would have had its own set of issues. But when all was said and done it was looking ok, and I still had plenty of time to make the fondant.
 While the cakes were back in the freezer getting nice and firm before I put rice crispies on them, I made the fondant. Once that was done I made up a batch of rice crispies and pulled the cake out of the freezer. It didn’t take very long to put on the rice crispies as there wasn’t too much to do, and as far as the face went I didn’t have to be too precise as I’d be able to do a bit more molding with the fondant. I had planned to use modeling chocolate to pad out the arms, as they were too thin to use rice crispies. Since the shoulders were a bit thicker though I thought I’d have a go at putting rice crispies there since I wasn’t actually sure how much modeling chocolate I had, and didn’t have any ingredients to make more. Luckily the cold from the cake set the crispies pretty well so they stayed in place quite nicely. I thought I’d try rice crispies for the inside of the feet too since there was plenty left over, the less fondant I needed to use the better.
Then it was back in the freezer for the night to set everything good and solid for fondant the next day.
Thursday as I was getting started on the fondant it started to rain. “Yay” I thought, as the rain should keep the temperature down. Unfortunately the rain didn’t last and the sun came out soon after making it hot and humid. But more on that in a bit.
I procrastinated a little as I realised that once I started I couldn’t really stop until it was almost finished. I’d originally planned to put the modeling chocolate on the arms first, freeze that for a bit to set the chocolate, then continue with the fondant. But looking at it I wouldn’t have room to put skirt on if the arm was padded, so I’d have to do the chocolate after the skirt. I wrote a list to make sure the order I did everything was correct. Lily, then skirt, then arms, torso, face and finally hair and decorations. If I waited too long between any of these stages the cake would thaw, becoming softer than I like it to be for working on.
 I started by covering the feet. I could do that without getting the cake out of the freezer, but then it was time to start covering.
I started with the lily. It ended up a bit thinner than I imagined, but it was ok, you wouldn’t be able to see much of it once everything else was done. Then I put the feet in place ready for the skirt. With the feet on it was easier to imagine what it was going to look like in the end which was encouraging. The skirt went on in a few stages which made it easier. The resting arm support was lower than I’d planned, actually sitting on the cake, which meant I’d have to cut the fondant to go around it, but the arm would hide the cut so that was ok.
It ended up trickier than I’d anticipated to create the folds in the skirt. Opposed to past experience the fondant didn’t want to fold as it went on, but was smoothing itself. Perhaps because I was doing it with smaller pieces rather than one big piece, perhaps the fondant was a bit thinner, perhaps due to the humid weather, probably a combination of them all.
 With the skirt done it was time to make the arms. I got out the modeling chocolate (left over from what was originally made for the Lion King cake) and found that the bag had a hole in it and the chocolate had totally dried up. Possibly it would have over that amount of time anyway, but try as I might to revive it, it remained stubbornly crumbly. I had a go at putting it on the arm support, but it never really had a chance. I wasn’t sure what to do, as I knew fondant by itself wouldn’t stick to the wire, and by this time the heat and cake thawing was causing the rice crispies around the shoulder to fall apart. I needed something that would stick to the wire, support the rice crispies, and hold up the fondant. There was only one thing that I could think of that would work, trusty old Blue Tack. Since no-one would be eating the arms anyway I figured it wouldn’t be a problem cheating a bit.
The Blue Tack worked a treat, and putting fondant on the torso and arms went without incident. I was a little worried about the weight of the fondant on the straight arm, but it held up ok. There was something else worrying going on though.
From the time the cake came out of the freezer it had started sweating. Beads of moisture forming on the butter icing and dripping down if left long enough. I was continually patting the icing dry with paper towels. I hadn’t come across this before, but I figured it must be the heat, as I’d made all my other cakes in winter. By the time I had covered the torso though, the moisture from the cake was actually starting to come through the fondant. Beads of moisture were appearing all over the skirt, and around where the arm was resting on the skirt it was just all wet. There wasn’t much to do but to hurry to get it covered. I had the air conditioner on, trying to keep the room cool. The weather also seemed to affect the fondant. It wasn’t drying out as it normally had, and was much stickier than I was used to, making it difficult to work with.
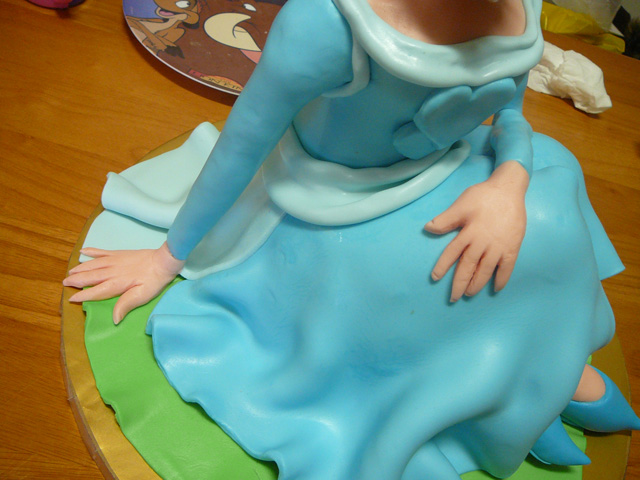 The next step was making the hands. Being in a hurry at this point, and having the fondant slippery and not very workable meant that the hands weren’t has good as I would have liked, but they were passable. The benefit to having the hands done is that the hand would help hold up the fondant of the straight arm as I was still a little worried about it slipping down.
Once I made the ruffs at the wrists the whole thing was getting very slippery and difficult to work on. It was also starting to get a bit late. I decided to do what hair I could and leave it at that for the day. I made the lower layers of hair, which covered the last open area of icing hopefully sealing it a bit from melting too much, and did a few decorations before freaking out too much at how wet the whole thing was. My sister had the idea that it was probably the added humidity that was causing the moisture, and it had been an evaporative air conditioner that I’d had on all day, not helping at all with the humidity level.
 I put on the reverse cycle air conditioner in my study and put the cake in there for the night hoping that the reduced moisture in the air and cold would keep the cake from melting too much. I was quite worried about how it would hold up with a whole other day to go before the party.
Just over an hour later I checked on the cake to see how it was holding up. With great relief I saw that it had almost completed dried. The reverse cycle air conditioner was just what it had needed. I went to bed confident it would hold up nicely until morning.
There was only one problem remaining, and that was that I’d planned to have Rani finished by then, so I’d have time to finish Elmo. I figured I’d get Rani finished first, and then get as much as I could done on Elmo. At the very least I hoped I’d be able to get the cake iced even if I wasn’t able to complete the decorative bits.
 The next day I checked the cake. Thankfully in the night it had fully dried out and the fondant that was there had hardened, so I didn’t have to be as careful with it as I worked on the face.
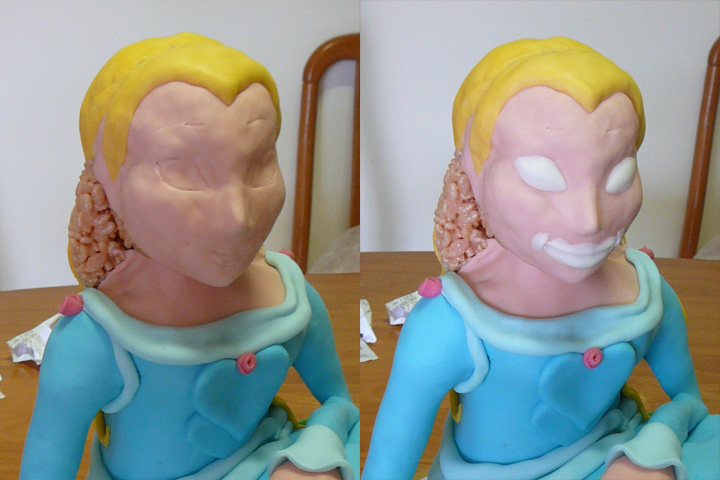
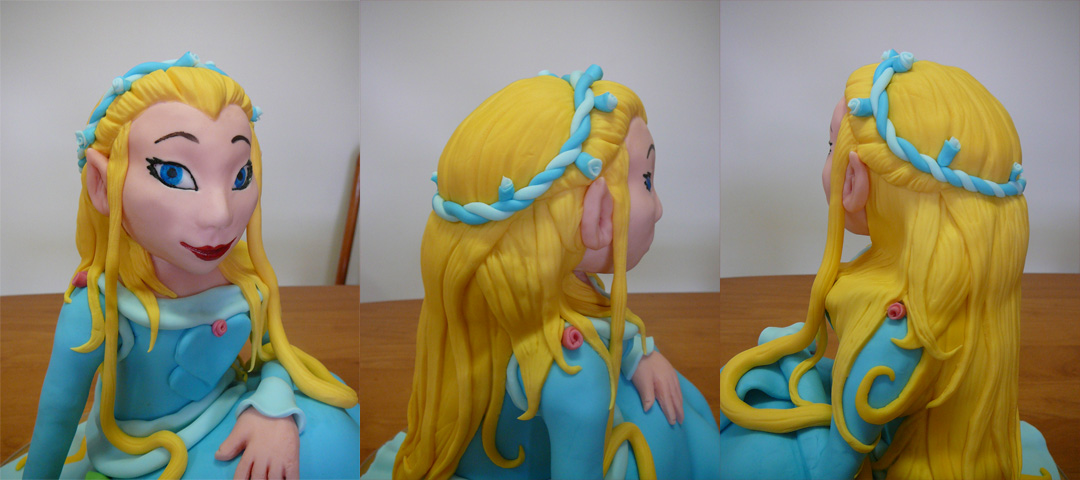
As I started on the face I wasn’t sure how best to combat the bumpiness of the rice crispies. Normally I’d just make the fondant as thick as possible so the bumps wouldn’t show through, but I needed the fondant to be thin because I’d be cutting the eyes out and I didn’t want the eyelids to be too thick. I decided to try two layers of fondant, keeping the overall thickness but allowing the top layer to be thin enough for the eyelids to work.
So I put a few bits of fondant in place to mold the face a bit, the nose, chin, a bit on the cheeks. I placed a layer of fondant over that, and then marked out where the features would go, the eyes, lips and eyebrows. Next I put on white for the eyeballs which would appear under the cut out eyelids, and put some padding for the lips. I also needed to pad the hair a bit, as I wanted it to have some body, and wanted a definite indent for the hair band.
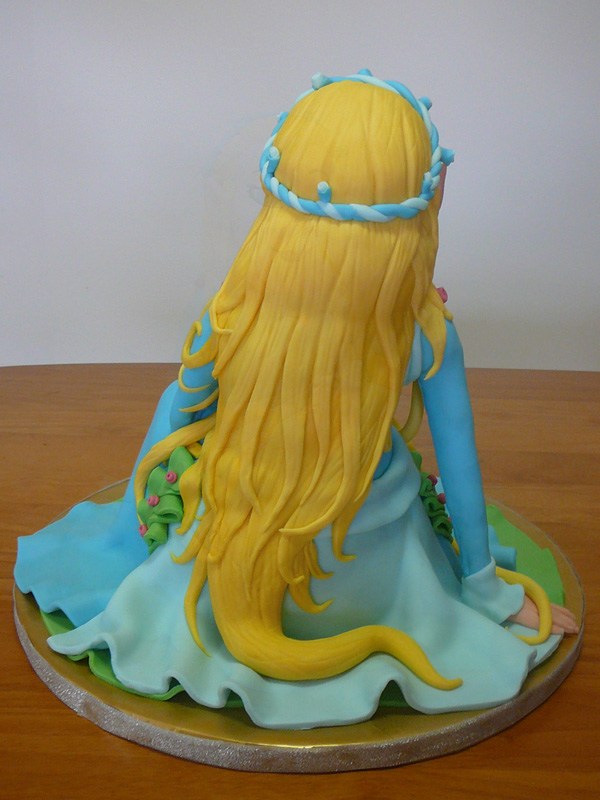
 The face ended up smooth enough and, although I could do with some practice molding faces out of fondant covered rice crispies, it didn’t look too bad. I was really happy with how the hair came out though. It had bulges in the right places, and the detailing really sold it. I hadn’t been sure how I was going to do the hair to start with, but what I stumbled onto worked really well.
There was just the head band to go and the fondant was finished, Yay! I made the head band and put Rani aside to firm up a bit before doing her makeup. It was finally time to get onto Elmo.
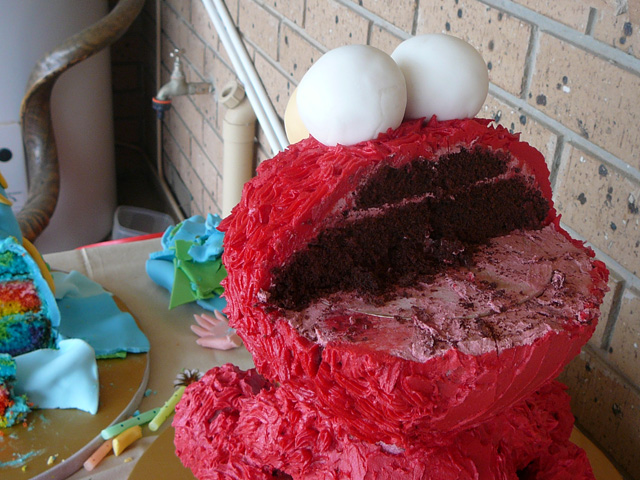
 For Elmo I’d carved the cakes and done the crumb coat. I’d added rice crispies for the legs, feet, arms and hands. My wife made a special gluten and dairy free cake for Alekos’ smash cake (he has a bunch of food allergies). All this had been sitting in the freezer with a big snapper and half a sheep for two months, so I wasn’t sure how nice the cake would be, but it was more about the presentation, as there would be plenty of cake to eat from Rani. I’d also already made the eyes and nose out of rice crispies and fondant.
The first job was to make the smash cake, the little one Elmo is holding (Ok, I should mention that until a couple of months ago I didn’t know what a smash cake was. I found out it’s the special cake that young birthday kids are given for themselves to get messy with while the other or rest of the cake is cut for the guests). I made special icing that Alekos could eat, and put the cake together with some fondant decorations that could be taken off before giving him the cake. The smash cake sits on its own little cake board so it can be easily separated and given to the birthday boy.
Now my plan had been to have Elmo holding the cake, with a present and some blocks in front of him to hide the support structure, and the blocks would also spell out his name. I’d made the present and one block previously, and had the other blocks half made, all made out of cake and fondant so they could be little single serves.
I figured I’d ice Elmo first to make sure the most important part was done, and then get onto the remaining blocks if there was time. It was already mid afternoon on the day before the party…
I still had some chocolate fondant from the Lion King cake, of which I managed to salvage enough to roll out and use for the inside of Elmo’s mouth. I used some off-cuts to cut his pupils out from too, as I hadn’t made them earlier.
The red icing had also been sitting in the fridge for two months. Previously I’ve made icing with butter and icing sugar, but this time I made it out of copha (shortening) instead of butter. Alekos’ party was going to be outside and potentially warm. I was worried that butter icing might melt or at least go soft since I wouldn’t be able to control the environment, there might not even be any shade so it could be in full sun. I thought copha would hold up a bit better than butter as it’s got a higher melting point. Another benefit to using copha is the icing ends up white rather than the slightly yellow color of butter icing, so it colors better. And my wife actually prefers the taste of the copha icing as she thinks butter icing is too sweet.
 When I was making the icing I wanted to make sure it was really red, a nice deep color. I’d read that the color sets in over time, that if you make it a few days early that it ends up with better color. I’d made it three days eary so it’d have time to set in, but as I was mixing, it just wasn’t getting anywhere near the color I wanted, it just stayed pink no matter how much coloring I put in. I ended up putting in almost an entire jar of Wilton red, along with some spashes of other red coloring I had and some Wilton pink. Nothing was even getting it remotely close. I thought Elmo would just have to be pinkish, and hoped that it at least got a little darker when it set in. I checked it every day to see how the color was going, but it didn’t change. Even after a week it hadn’t changed color. So I assumed the color hadn’t set in as I’d read, that Elmo would end up pink.
I wasn’t exactly sure how I was going to do the fur look for the icing. I had a grass nozzle and a star nozzle. I thought one of those should work, as i’d seen “furry” cakes made with both. I thought I’d get slightly better results from the star nozzle, so I started with that one and whipped up half the icing. It darkened a bit as I whipped it, so that was encouraging.
Being fur, I needed to start at the bottom and work up so that hair layered properly. The only trouble was that I wasn’t sure I’d have enough icing, and didn’t have enough red coloring to make more. I decided to do the most important areas first. After doing a patch on the back to test my technique I started on the face. To my surprise as the icing ran through the heat of my hand on the icing bag it was turning a really deep red. The warmer the icing got the deeper the color went. So I guess the color really had set in, or perhaps it had just needed to be warmed from the beginning, I’m not sure.
I worked on the front and head, working up from the chest to the head. I put fur on the front of the arms and legs and feet. I just spread the icing on the underside of the legs, and the back. I neded up with just enough to give it all a coating of the deeper red color (the crumb coat had been quite pink) with fur on the most visible areas. I tried to make the fur look like clumps of scruffy hair. I must admit I rushed it a bit, but it didn’t look too bad.
It was getting on for 10pm by the time I finished the icing, and I still had Rani’s makeup to do, so I put on the eyes and nose, and put the present and block in place and called it done.
I pulled out my colors and prepared to paint Rani’s face. Being late and I was pretty tired by this point, I didn’t think it through very well before painting the face, and the color ended up much darker than I’d intended. I would have preferred it to be much more subtle, but it wasn’t too bad, and I couldn’t do anything about it at that point anyway.
So even though I was running late and skipped some bits, I’d managed to get both cakes done with enough time for a good nights sleep before the party.
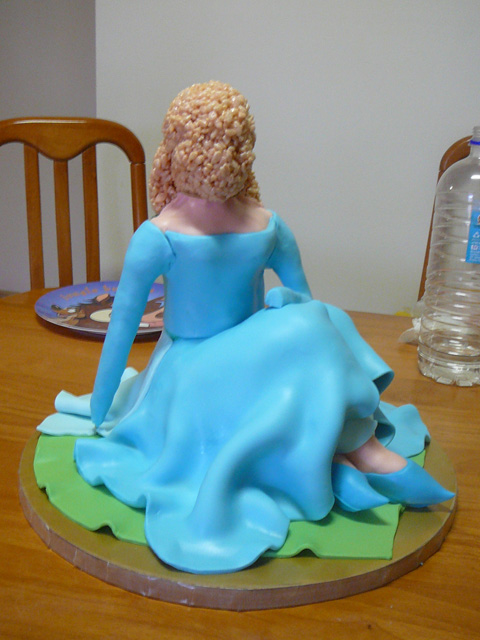
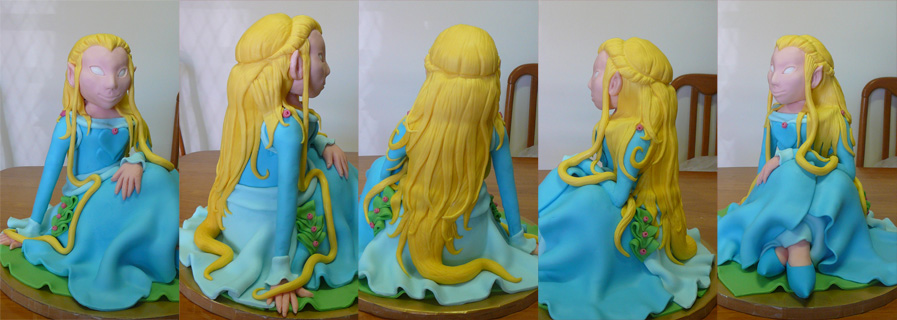
Here are some more pics of the finished Rani cake:

And here’s the result of the rainbow colors:
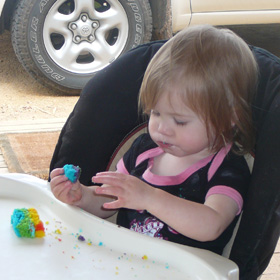
An interesting side effect of rainbow cake is green poo. You might not normally even notice, but Serenity had two pieces of rainbow cake and the next day when we changed her nappy, her poo was bright radioactive green.
Speaking of green, you can just see my patriotic green and yellow cream puffs in the background there. I’m planning red and green ones for Christmas…
If anyone knows more about the science of coloring icing, or how to better deal with cake decorating in hot humid weather I’d love to hear from you so please leave a comment. For example if the color doesn’t show it’s true intensity until it’s heated a few days after coloring, how do you know how much color to put in? Or does it just come down to experience?
Likewise, if you have any questions about what I’ve done here please leave a comment and I’ll do my best to answer.