As I’m just getting started on a new cake, I thought I’d post some of my previous ones…
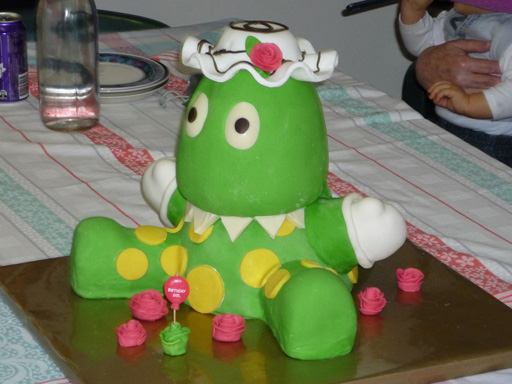
 When I was young I always made cakes for my family, especially my little sister as she grew up. After not making any for a few years I was excited to make birthday cakes for my own kids. This is Anastasia’s 2nd birthday cake from December last year.
Even a few months ago though, I had little idea about 3d sculpted cakes, I barely knew they existed let alone had any thoughts of making them. Just before my youngest’s 1st birthday a friend showed me some 3d cakes she’d made using fondant. I was amazed at what she’d done and what was possible. I made, what I sure was, the most elaborate Dorothy the Dinosaur cake ever made (little did I know).
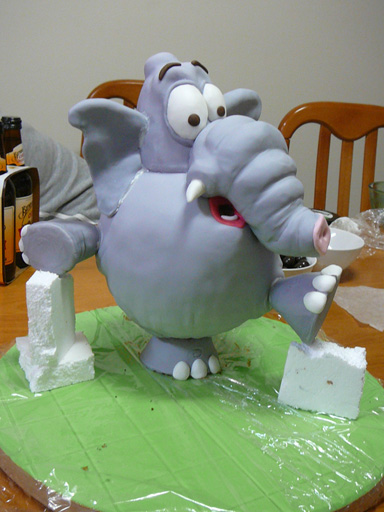
 Proud of what I’d done, but having learned a great deal from the mistakes I’d made, I started to investigate further, scouring the net for more examples and information. I couldn’t believe my eyes. What I’d made was quite basic compared to many of the creations I’d found, and I’d found a new passion. I had to learn more. I spent a few weeks absorbing as much as I could, seeing what was possible, trying to find out how it had been done, and planning how I could use all this new information to make bigger and better cakes. A friends birthday was coming up, a great opportunity to get some more practice in. I was a bit bolder with this one, which unfortunately came back to haunt me…
Everything was working out pretty well until I was pulling the plastic wrap off the base when the elephants body fell off it’s foot. I hadn’t made the support strong enough and the glue had given way (although if I’d made it the way I originally planned it would have been fine. Lesson: Don’t get flustered at the hardware store when your kid is screaming in your ear, or even better leave the kids at home). But the birthday girl still loved it, and I learned even more than the last one.
Around this time my sister was starting to organise my nephews Christening. Having seen my previous cakes, she asked me to make a cake for the occasion with a Lion King theme (her married name is Aslanidis which means Lion). Being a christening the only thing we could imagine was the pride rock scene. I knew it was a huge endeavor, one way beyond my experience level, but I’ve always been one to dive in the deep end. I spent a few weeks of spare time planning it, measuring, figuring out how much cake was needed (70+ serves) so I could work out what size it would need to be.
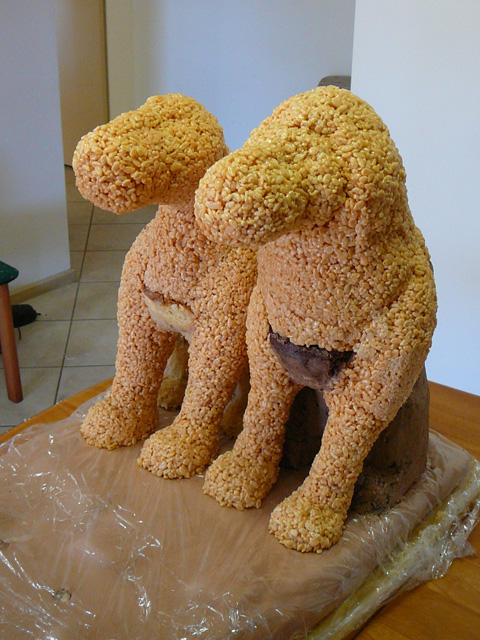
 With just under 2 weeks to go I made a practice lion with the theory that I could make all my mistakes on that one and be ready to make the final ones. I hadn’t made my own rice crispies before, so I wanted to test that. I also wanted to test the armature as it would have to withstand a 2 hour car trip to get to its destination. Over 4 days I made the practice lion which went really well, and I learned a lot from making it. Under a week to go and I felt confident. I had made a checklist for each day, for what needed to be done. It was going to be a busy week, even with all my planning I ended up making up a lot as I went…
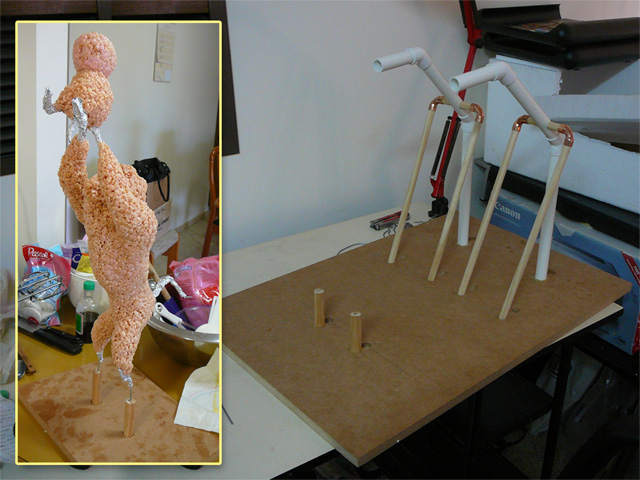 Monday I shopped for all the ingredients, made the board and attached the armature. I had planned just to make Rafiki and the cub in place on the final board, but realized that I needed to make, place and ice the “rock” under him, as well as needing to put the final cake in and out of the freezer, which I didn’t know how would affect the modeling chocolate. So I made a duplicate stand for Rafiki so he could be made separately and placed on the final board at the end. I also made the rice crispies for Rafiki and put them on his armature.
Tuesday I made the slab cake and all the fondant I’d need.
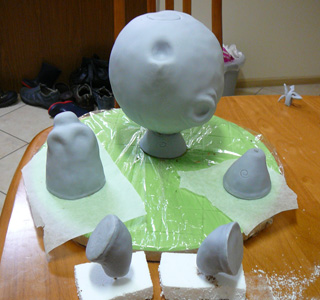
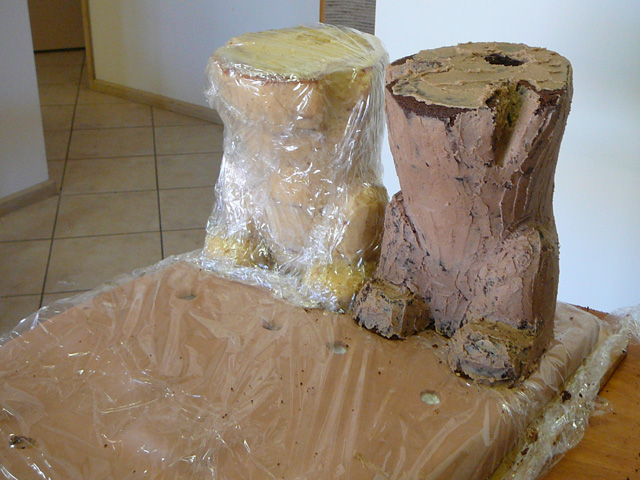
Wednesday I made the cakes for the lions and iced and covered the rock (3/4 polystyrene 1/4 cake) with fondant.
I realised at this time that once the cakes for the lions were carved in place I wouldn’t be able to freeze the cake because of the rock already being covered in fondant (I’d read that you can’t freeze fondant or it comes out patchy). I’d kept the practice lion in the freezer right up to putting fondant on, so already things weren’t going to plan. But since the cakes would be coming out of the freezer, maybe they’d stay cold enough without going back in the freezer.
 Thursday I carved the cakes and put on the rice crispies. The carving went well, although by the end of the 2nd crumb coat the cakes were pretty much defrosted.
The rice crispies for the first lion went ok, I’d done the female first as I’d done that one before for the test. There was a little movement in the cake on her chest from the rice crispies pushing down on it, but it was manageable. Since the cake had been frozen when I’d done it for the test I hadn’t had that problem before.
Then I put the rice crispies on the male lion. Well not only had the cake well and truly thawed by now, I hadn’t accounted for the extra weight of the mane. The amount of rice crispies needed for the underside of the mane weren’t strong enough to withstand gravity by themselves, and the unfrozen cake was just buckling under the pressure (If it had been still frozen it would have been fine as the cake would have held up the rice crispies). The whole thing started to fall apart. The mane was falling forward, the cake was almost at breaking point. The shoulders were falling off without the mane to hold on to. Aaaahhhhh!! what to do???
 The only thing I could think of was to throw the whole thing in the freezer and hope that it froze quickly enough to a: hold the cake together, and b: set the rice crispies before too much damage was done. By massaging the cake/RKT’s a few times as they froze it managed to hold together. It was very late so I left it overnight and hoped that it would still be ok in the morning.
I happened to have had Dorothy’s head still in the freezer as it hadn’t been eaten. I’d taken it out Thursday morning just to see how the fondant reacted to being thawed as I’d been wary of allowing the cakes to defrost. The fondant seemed to be ok that evening once it had thawed, without any shiny patches, so I thought that being in the freezer would hopefully not ruin the already iced rock too much.
Friday I took out the cake and thankfully it hadn’t completely fallen apart. The mane and shoulder had fallen, leaving gaps, but the rice crispies had set so I could just fill those gaps with more rice crispies and add the head which I hadn’t got to the previous night.
I learned a great deal more about working with rice crispies which was great. The most important lesson I learned was that if you create a core of rice crispies around the armature and allow that to set (preferably freeze), additional rice crispies will adhere, defy gravity, and set much better.
Already running late, I quickly coated the rice crispies in royal icing, and gave the cakes another layer of butter cream icing, and it was onto the fondant.
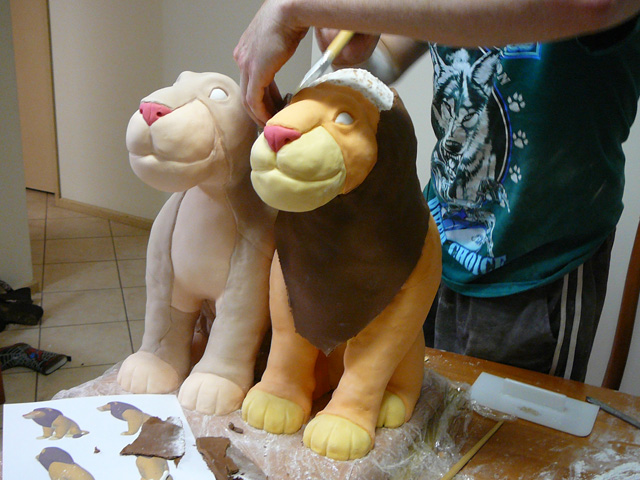 I hadn’t really accounted for the lions being so close together (their shoulders were actually touching), but the way I had made the armature there was no way to make them separate and put them together at the end. So there were a few more fondant patches than I would have liked, but overall the fondant wasn’t too bad an experience. My biggest fondant lesson is never to work with chocolate fondant again. The mane is covered in chocolate fondant and it was so difficult, and took so long to knead that I had bruised knuckles from it for days after.
So although I’d hoped to have the fondant finished by 8.30pm I didn’t get done till 11pm. Finally with that done I could rest… for 1/2 an hour, because with the full and busy days before I hadn’t even started the chocolate for Rafiki and the cub. Perhaps an all nighter ahead I grabbed something to eat, had a quick rest, and kissed my wife goodnight before getting started again.
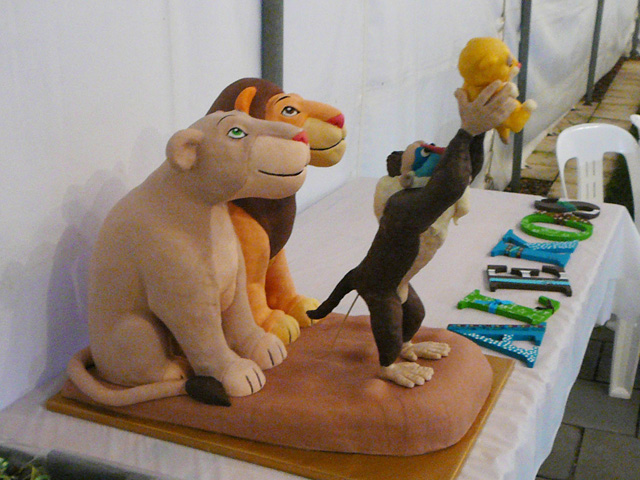
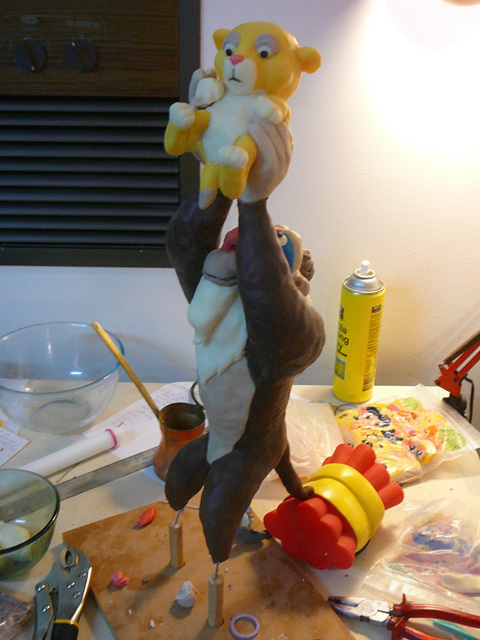 I quickly learned a few lessons working with the modeling chocolate (especially since I hadn’t worked with it before). One was that I loved working with it much more than fondant, and saw huge potential in it. Another was to leave plenty of time to knead, for this job actual modeling only took 2-3 hours, kneading took 3-4 hours. And another is that it’s really quite heavy so allow for that when making the armature. As you can see from the photos I ended up having to prop Rafiki up with a skewer because of the weight. In hindsight a tripod armature (including the tail and the 2 legs) would have been better.
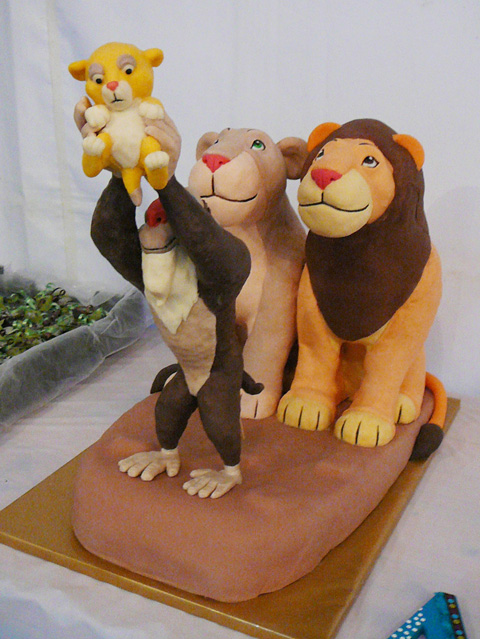
7 hours later I’d finished Rafiki and the cub and all that was left was to color the eyes and features of the lions. I finally climbed into bed 4 hours before we had to leave, but happy that I’d managed to finish the cake.
The Christening reception went very well. The cake held up until it was cut, and was generally very successful. But I don’t think I’ll make anything this ambitious for a while…
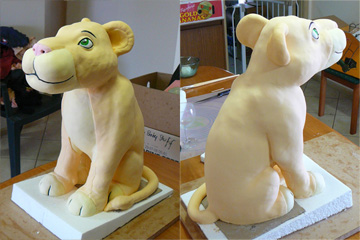
Here is the finished cake:
My nephews birthday cake is currently in production, and I’m just starting to plan Anastasia’s 3rd birthday cake, so I’ll post some more cake pics soon…