Welcome to part 3 of the making of my nephew’s Elmo cake. In Part 1 I talked about planning the cake, making the stand and making the icing. In Part 2 I talked about making and carving the cakes. In this installment I’ll cover making and molding the rice crispy arms, legs, eyes and nose, and creating the blocks. The final one will cover piping the fur and finishing touches.
We left off last time with the carved cakes in the freezer. I usually put aside whole day for carving the cake, adding rice crispies, and preparing it for final icing, so I’ll carve the cake in the morning and do the rice crispies in the afternoon. Having the cake in the freezer while you make the rice crispies should be long enough to firm up any parts that have started to thaw. Otherwise you can leave the carved cake in the freezer until the next day, or pretty much for as long as you need.
Rice Crispies
Rice Crispies Recipe
I’ve adjusted the recipe for Aussie measurements, and for the 250g bags of marshmallows available here.
Melt 1-2 tablespoons of butter in a large bowl. Add 250g of marshmallows and toss to coat. Microwave for 45 secs, stir and microwave another 45 secs and stir. Microwave another 10-15 secs if necessary to fully melt the marshmallows.
Add 5 cups of rice bubbles and stir until mixed well. Leave to cool for 5-10 minutes before using.
Note: The hotter the marshmallows the harder the rice crispies will be, so if in doubt, it’s better to microwave a bit longer than necessary.
I made the arms and legs from rice crispies. You don’t necessarily need to use rice crispies for the arms and legs, but I’ll talk more about that later. The eyes and nose are also rice crispies covered with fondant. These really are best made with rice crispies. You could also make some or all of the blocks and toys from rice crispies instead of cake. Certainly if you want to make a ball toy, that would be easier with rice crispies than cake. But before I get too ahead of myself, let’s talk about what rice crispies are, and why you would want to put them in a cake?
Rice crispies are a combination of rice bubbles, or some other kind of puffed rice, and melted marshmallows. They’re often used in 3d cakes like this one, for a number of reasons. Rice crispies are light, much lighter than cake. I was quite surprised at first just how heavy some of these cakes end up when you’re talking about feeding 40 people or more. If you want a cake structure that is larger than the amount of cake you need then it’s useful to use rice crispies for some parts just so you can more easily carry it. Also when you’re making tall cakes, or cakes that are top heavy, rice crispies can be used for the top parts so you don’t need such strong support.
Rice crispies are much cheaper than cake. Again, if you have a cake structure that’s bigger than the number of servings needed, you can save on the weight and the cost of ingredients by using rice crispies.
Rice crispies can be molded into all sorts of shapes, wrapped around armatures, and are generally more versatile than cake. Once set they can be carved to shape them even more. Lastly, they are quite strong when set, quite a bit stronger than cake as a rule.
There are alternatives to rice crispies. Polystyrene is often used instead of cake or rice crispies, hidden under the icing of a 3D cake. Personally I prefer to use rice crispies instead of polystyrene as I like to make as much of my cakes edible as possible, more out of principle than for any other reason. It adds to the challenge. I have used polystyrene before though, as a base for the Lion King cake, where it would have been impractical using rice crispies.
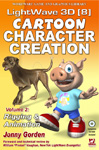
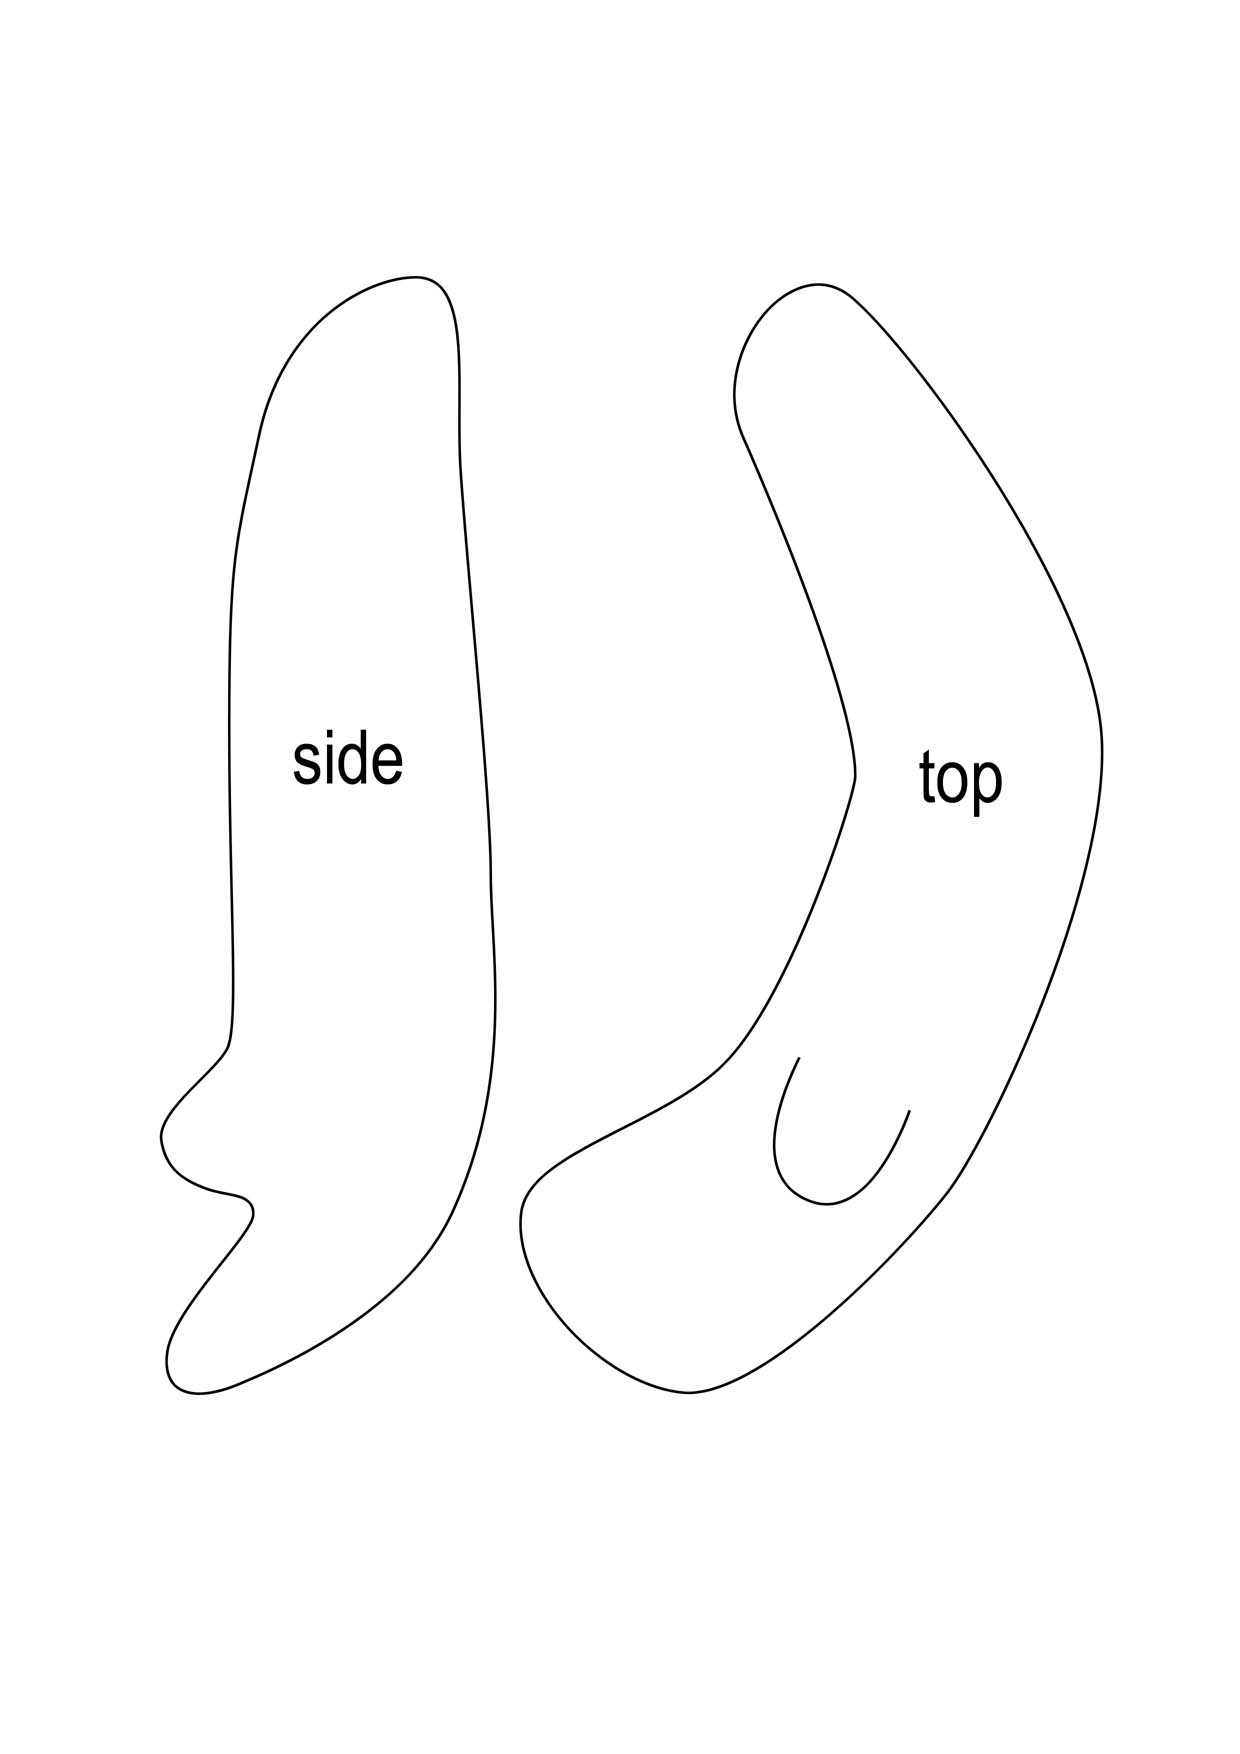
Before making the rice crispies, make sure you have the plans or measurements for what you’re going to make with them. The images on the right are the plans I made for the present, blocks, eyes and nose and arms. Like the others, these are made to fit an A4 page, so print them at that size to get the right measurements.
So let’s get to it. We’ll do all the parts we need the cake for first, so we can get the cake back into the freezer before it thaws too much. Make a batch of rice crispies, and as they’re cooling, grab the cake from the freezer to get it ready for the rice crispies. Start by wrapping the coat hanger wire (previously bent into shape and plugged into the board) with aluminium foil. This helps the rice crispies attach better and keeps everything hygienic. It shouldn’t be too smooth, in fact the rougher it is the better. But make sure it’s nice and tight. The rice crispies will be sticking to the foil, so the foil needs to stick to the wire or it may start to fall apart.
Grab a spoonful of rice crispies and mold it into a ball in your hands. If it’s very sticky on your hands or fingers, you can wipe a little butter on your fingers to stop it sticking. Push the ball of rice crispies onto the armature at the base of one of Elmo’s feet. Add another ball of rice crispies until you’ve built up the whole foot. Compact it tight with your hands, as tight as you can make it. This might reduce the size of the foot so you may need to add some more rice crispies. Once you’ve done the foot, start with the leg. Pack balls of rice crispies around the wire from the foot, working your way up to the knee. When you’re near the knee, start packing rice crispies around where the wire and body join. You’ll find the rice crispies should set fairly quickly there, as the cold from the cake freezes them a little. Again, work your way up to the knee and join onto the rice crispies already there, remembering to pack tight as you go. Keep in mind the leg shouldn’t be very thick so don’t put too much rice crispies around it. Around 4cm thick is about right. Thinner than that and there won’t be enough rice crispies to hold. Thicker than that and the legs will be too fat. But you don’t have to be too precise with your molding, especially for the feet. Remember you’ll be covering the whole lot with icing later. Repeat the process for the other leg.
Rice Crispies Tips
Molding rice crispies often ends up being a gravity defying exercise, and you’ll soon find they love falling down if there’s not much holding them up. One of the tricks to putting rice crispies on an armature is to start at the bottom and work upwards. That way the lower sections provide support for the higher ones as you build up. Another trick is that if you’re building up something large or thick it’s sometimes easier to create a smaller core of rice crispies around the armature, allow that to set, and then create your larger form. The rice crispies will stick to themselves far better than to the armature so they’ll be less likely to fall off.
Now that’s done we’ll do the arms. Mold a sausage of rice crispies, and using the template bend it into the right shape. Don’t worry about including the thumb, I realized after making the template that the thumb would get in the way of removing the smash cake. Also don’t worry too much about the hand, as that part will end up hidden under the smash cake. Make another sausage and bend the other way, making a mirror image of the first arm. The arms need to be as compacted as possible, so really squeeze them tight.
As you’re making the arms, keep checking the legs, that the rice crispies aren’t falling off, especially on the underside of the legs. Squeeze them back on if they come loose. When they’re finished, place the arms on the cake board and place the cake board back in the freezer. Freezing the rice crispies for a couple of hours, or overnight, helps them set. I’ve found leaving them too long (like 5 weeks) can have the opposite effect though, just something to keep in mind.
With the arms and legs safely away, we can make the eyes and nose. Looking at the template images, the eye and nose are their final size, so when making the rice crispies for them you’ll need to make them a bit smaller to allow for the fondant. Roll two balls for the eyes, and one oval shaped ball for the nose. Put them in the freezer to set along with the rest.
If at any time you run out of rice crispies, you can just make another batch, making sure you wash out the bowl first.
Blocks, Toys and Fondant
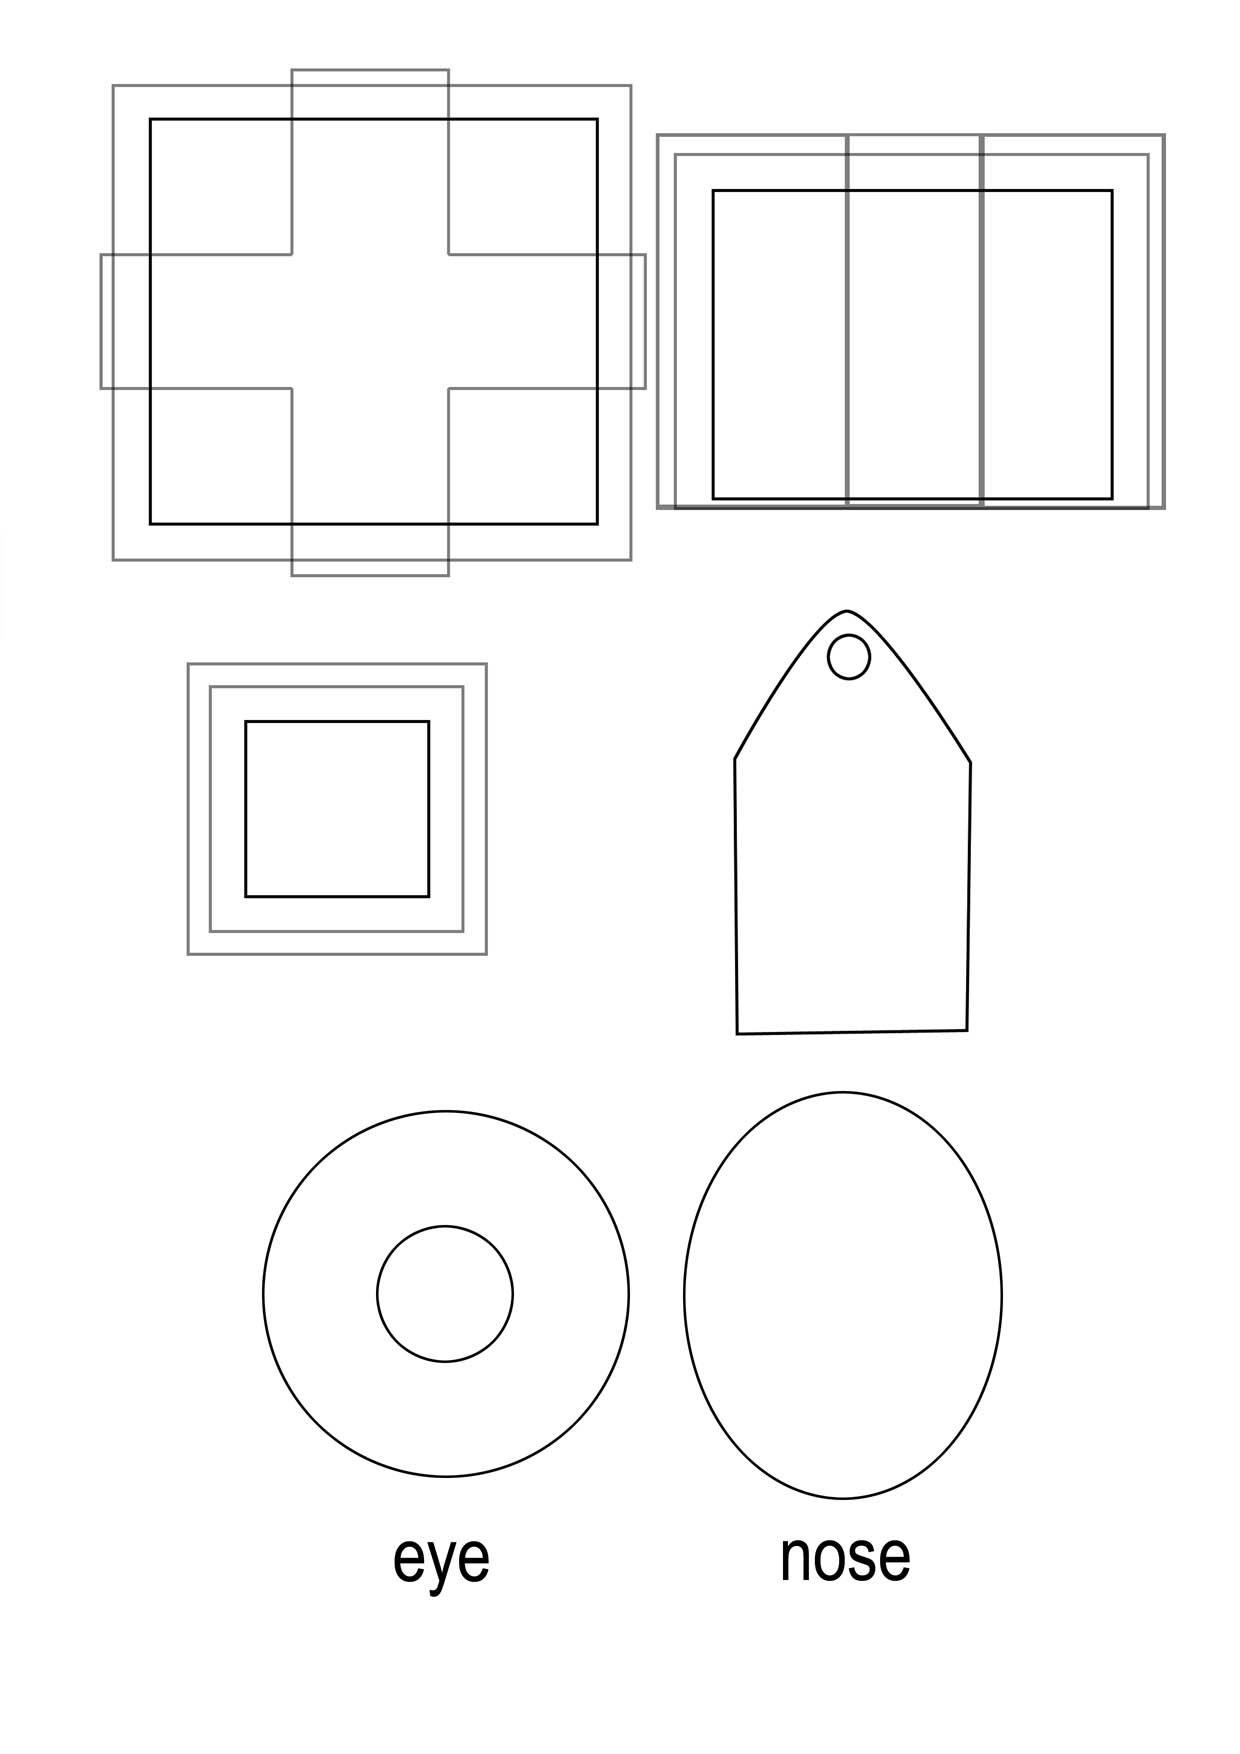
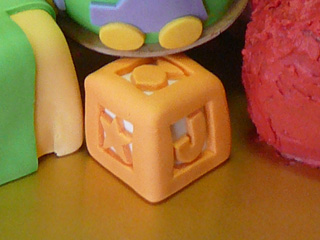
 Now if you wanted to make some of the blocks or toys from rice crispies, you could go ahead and make them now with the left overs. The very inside square of the present and block images is the size the cake or rice crispies core should be. You can see a rice crispies block in the pic to the right, compared to the blocks with the first, white fondant layer (the yellow block is an earlier practice one I made), and a finished block in the pic below. With a few cake or rice crispies cores made, freeze them for as long as necessary to make them nice and firm.
If making the blocks out of cake, give each a crumb coat of icing before putting in the freezer. This will help the fondant to stick, and give the cake some added flavour. If you’re making the blocks out of rice crispies you don’t need to give them a crumb coat, as fondant sticks well to plain rice crispies.
To make the blocks there are three layers. The core made of cake or rice crispies, a white layer of fondant, then a colored layer of fondant for the edges and features of the block. My original plan was to write Happy Birthday on a tag attached to the present, with the birthday boy’s name spelled out on the blocks. These would be arranged in the front, so would have the added benefit of hiding the cake stand under the smash cake maintaining the illusion that Elmo is holding it.
 When the cores are frozen, open the fondant and roll some out to about 1/2cm thick. Place a block on the fondant and cut around the base, so the block is sitting on a square of fondant the same size as one of its sides. Turn the block upside down and repeat. Now you should have the core sandwiched by two pieces of fondant. Turn the block on its side (with the fondant attached), place it on the fondant, and mark the fondant along the front and sides of the block. Cut a strip of fondant the width of the block following the line of each side cut. Roll the block along the fondant strip, lifting the fondant with it, and smoothing each side as you go. Cut the fondant where it meets the first edge. You should now have a completely covered block like the ones in the image above. With a fondant smoother, or something else flat, press each side so the block is smooth, flat and square. Repeat for all the other blocks. (This is a bit tricky to describe without pictures. I’ll take some video or pics of the process and include them here when I get a chance.)
It’s useful to let these blocks sit for a while to harden, overnight if possible. The firmer they are, the more square the final blocks will be. If they’re too soft then the final blocks will be in danger of having very rounded corners and edges.
Eyes and Nose
While the blocks are setting we can move onto the eyes and nose. Now covering balls with fondant is tricky at the best of times. What I’m about to describe here is the best way I’ve come up with for covering small balls with fondant, there may well be other methods I’m unaware of. What I have seen is that for balls of this size it’s usually suggested to just roll a ball of fondant. The reason I didn’t want to do that here is that even though the top of the mouth is supported, too much weight on top will still cause it to droop or fall completely. Since a solid ball of fondant is much heavier than one made with rice crispies, I chose the more difficult option of covering a rice crispies ball with fondant.
The way I cover a small ball with fondant is to roll out enough fondant to cover the ball, leaving it about twice or even three times as thick as it’ll end up being. The final fondant cover should still be thicker than average though, I’d say around 3/4cm (a bit over 1/4″) thick. Pick up the fondant and work it into a cup shape. Place the rice crispies ball into the cup of fondant and gently close the hole around the ball, working out the wrinkles as much as possible. When you’ve closed the hole completely over you’ll have a lumpy ball. Now the magic. Make sure your table or surface is completely clean. Roll the ball between your hand and the table using big motions so you cover the whole ball. Roll the ball back and forth, especially over the top and sides, making them as smooth as possible. Keep rolling until you have a very smooth ball with a few barely visible creases towards the bottom, and an only slightly more visible seam where the hole closed over. That’s ok, because that is the part that’ll sit on the cake hidden from view. Repeat for the other eye.
Now take a little more fondant that used for each eye and color it orange for the nose. Once it’s colored and kneaded well through, repeat the ball process for the nose, keeping in mind that the top and front of the nose are most important to keep smooth and unblemished. The back and base of the nose will be hidden.
Back to the Blocks
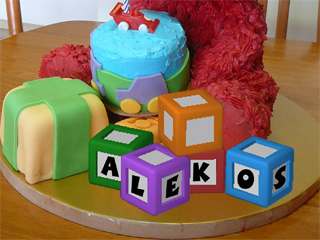 My goal for the blocks was to avoid being able to see any seams. I wanted the blocks to, well, look like real blocks. To accomplish this, I really only needed to cover three sides of the block with a single piece of fondant, as you can only ever see three sides of a block from any one angle. I knew I’d be able to arrange the blocks so the best sides were facing out. Two of the blocks would have a single letter of the birthday boy’s name, and two would each have two letters as shown in the pic. The remaining sides would have random letters, pictures and numbers on them.
So we need to color enough fondant to cover a block (or more if you want more than one of each color). Then roll it out about 1/4cm (1/8″) thick. Position one of the blocks with a corner facing you and lay the fondant over the block, covering three sides. Smooth the fondant on each side, making the edges and corner as sharp as possible. At the edges, cut the fondant flush with the sides of the white fondant block. Now turn the block over so the remaining three sides are facing you. Repeat the process, only at the end, cut the edges of the fondant flush with the previously laid color layer. Lift up each edge and wet along it with a brush or toothpick. Lay the edges back down and smooth over to seal the edge. With the right corner facing you, you shouldn’t be able to see any seams.
With a sharp knife, cut out a square from each side that will be visible on the final cake, being careful not to cut into the white fondant layer. Cut each square into a letter, number or shape and, by wetting the back just a little, stick back on the block.
That’s about it really. Leave the fondant covered eyes, nose and blocks in a cool, dry place to firm up, preferably overnight. If you want to make a ball toy or two, you can follow the same method as the eyes and nose, or you could do two halves different colors. The present is just a box with strips of fondant for the ribbon, and I’d originally planned a bow that I didn’t get to. I also had meant to cut the bottom off the present I made, to make it shorter, and get rid of the wrinkles, only in my haste I didn’t get around to it.
Next one should be the final installment, where I’ll get onto the final fur icing and finishing touches.
As always, if you have any comments or questions please feel free to leave them below and I’ll answer them directly or in the next installment.
Continue to How I Made an Elmo Cake… Part 4, the Conclusion…